Last updated on August 4th, 2022 at 11:51 am
To begin with I wrote a blog set about how to create an Android 4.4 R5 VM. Shortly after completing those posts, I stumbled across Android 5.1 RC1. Many of you might be asking why a Microsoft Endpoint Manager Configuration Manager (MEMCM / MECM / SCCM / ConfigMgr ) admin would use Android VMs? The answer is simple. I want to test ConfigMgr, Intune and all the cool features of Mobile Application Management (MAM) without having to use a physical device! Who want a tons of Android tables vs having VMs to test one.
By the way, to create the VM itself, the steps are exactly the same for the Android 5.1 RC1 as they are for the Android 4.4 R5. If you want to read more about how to create the VM, check out my earlier blog post.
This post will take you through the steps on how to create an Android 5.1 RC1 VM.
How to Install Android 5.1 RC1 on Hyper-V
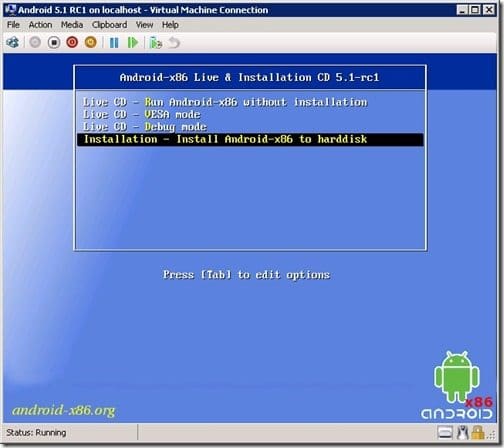
2. Start the VM, and then select Installation.
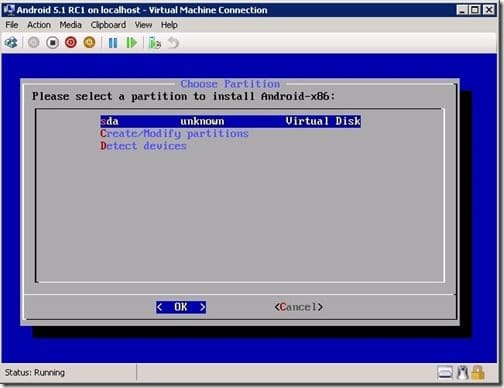
3. Create a new partition.

4. Then select No for GPT.
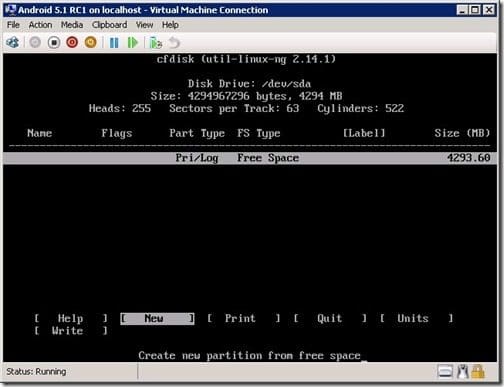
5. Select New.
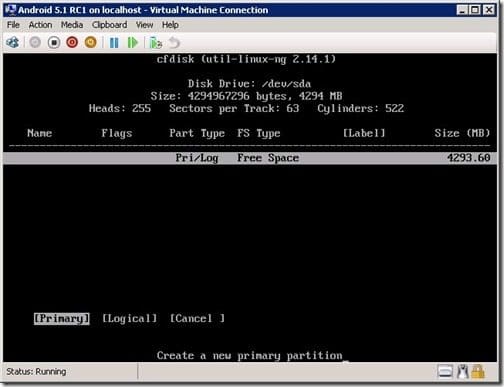
6. Select Primary.
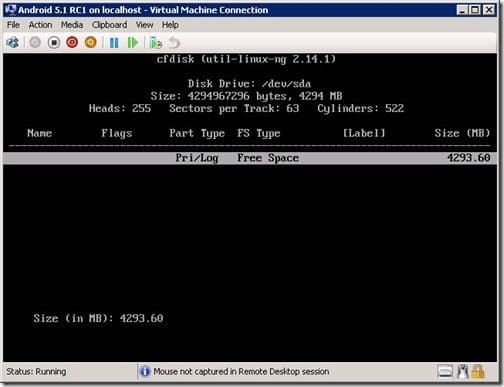
7. At this time, use the full hard drive size.

8. Select Bootable.
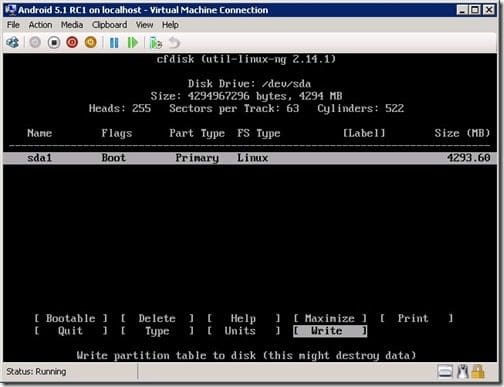
9. Select Write.
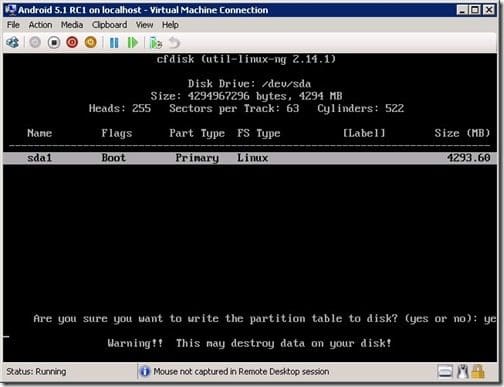
10. Type yes.
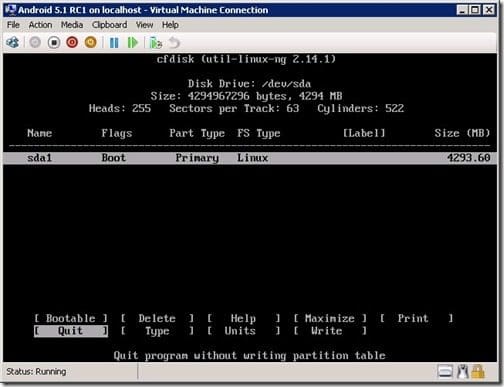
11. Select Quit.
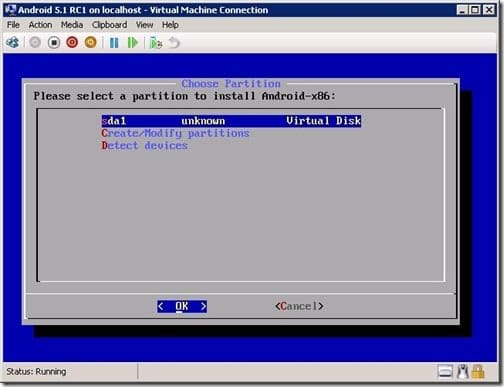
12. Select OK.
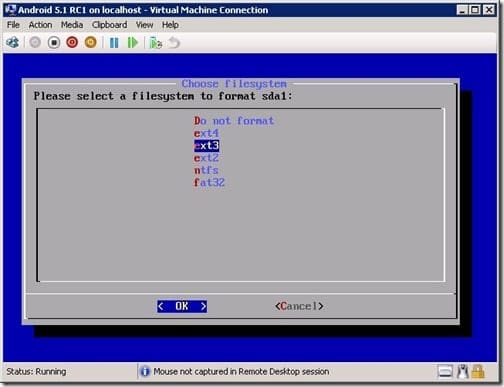
13. Select ext3.
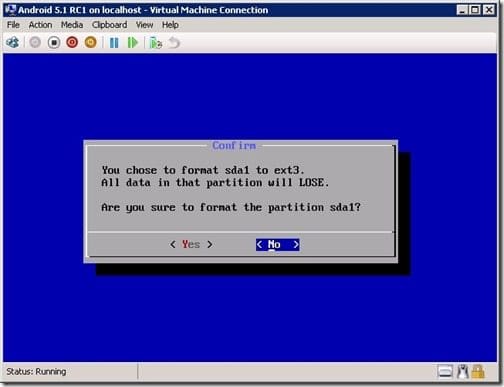
14. Select Yes.

15. Select Yes to install boot loader GRUB.
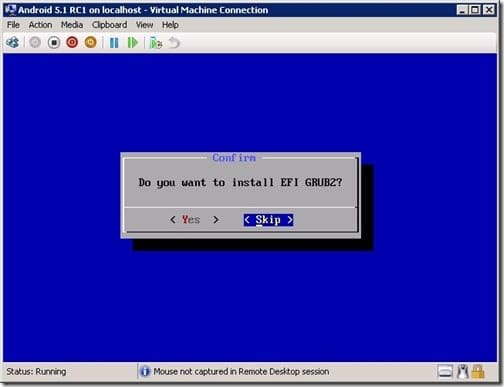
16. Select Skip for EFI GRUB2.
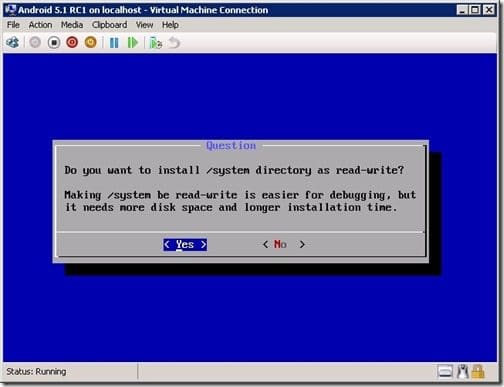
17. Select No to the system directory.
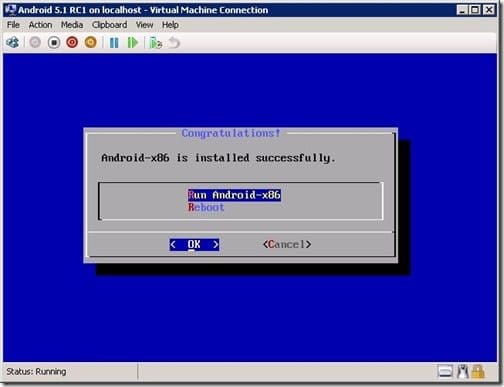
At this point, I like to reboot the VM to make sure everything is working great. Don’t forget to remove the ISO before rebooting.
Final thoughts
Technically, the Android VM is installed at this point, but you still need to configure it. In tomorrow’s blog post I will take you through those steps.
Don’t forget that you can subscribe to my RRS feed to stay on top of the latest trips and tricks. If you have any questions, please feel free to touch base @Garthmj.
