


ConfigMgr Console
How to Set the Default Report Parameters for a ConfigMgr Report

Topics: ConfigMgr Console
If you use Microsoft Configuration Manager (ConfigMgr) a lot, you most likely use the reports a lot too! You are also more likely to send the ConfigMgr reporting site link to other teams or people in your organization, like the CTO or the security team. One of the things that you want to avoid, however, is constantly telling everyone what collection or settings to select each time. So, wouldn’t it be nice to set up a default value for your prompts? Well, I’m happy to tell you that you can do just that! There are two (kind of) ways for setting default report parameters. This blog post covers both methods, so you can save yourself some time and trouble in the long run.
This blog post originally started off as two different posts covering more-or-less the same topic. After reviewing both, I felt it was better to merge them into one. What I didn’t do was recreate all of the screenshots to make it look like I was working on one report from start to finish. I felt it was better to talk about the process and not take a lot of time redoing the screenshots. All of this is to say there are different report screenshots for different sections within this blog post and that’s the reason why.
Can You Set Default Report Parameters in All Versions of Power BI Report Server and SSRS?
Yes! The process might slightly vary (I really mean slightly) from one version to the next, but you can do this in ALL versions of Power BI Report Server (PBRS) and SQL Server Reporting Services (SSRS).
In my example below, I will be using PBRS 2019, but I confirmed that the steps are EXACTLY the same in SSRS 2016, SSRS 2017, and SSRS 2019. It is only when you are using a much older version, such as SSRS 2005 (which is no longer supported) that the steps change ever so slightly.
Note: admin rights are required to perform these steps and set the default report parameters.
What Are the Two Ways for Setting Default Prompt Values?
This is kind of a trick question because, more or less, they both do the same thing.
- You can set the default value within PBRS or SSRS.
- Or, you can set the default value within Visual Studio/Report Builder. Since the steps are essentially the same for Visual Studio and Report Builder, I will only show Visual Studio in this blog post.
Keep in mind that if you set the prompt’s default value within PBRS or SSRS, it only applies to that server. However, if you set the default value within Visual Studio, it applies to all SSRS and PBRS servers, unless overwritten by the first method.
Why Use One Method Over the Other?
There is no right or wrong answer. But, the short answer is: if you are building a report in Visual Studio, it is best to set default values right off the bat for most, but not all, prompts. Remember that if all prompts have a default value the dashboard/report will run automatically when selected. What you ideally want are one or two prompts that require manual selection. This way the report doesn’t run until the prompt values are selected and the “View Report” button is clicked.
In my opinion, it is a good practice to set default values for just about all prompts except for the collection prompt (in most cases). This is done so that a dashboard/report isn’t automatically run and then you have to re-run it again. I encourage everyone to set their own default values where it makes sense to them.
How to Set the Default Report Parameters in PBRS and SSRS
As many of you know I recommend that you access the PBRS or SSRS website directly instead of going through the console. There are two ways to edit the default report parameters. The hard way is to edit the report and set the default on the prompt properties. The easy way is to update the values on the PBRS or SSRS website. This is the method that I will show below. As a side note, I confirmed that there is NO way to do this task from within the ConfigMgr console itself.
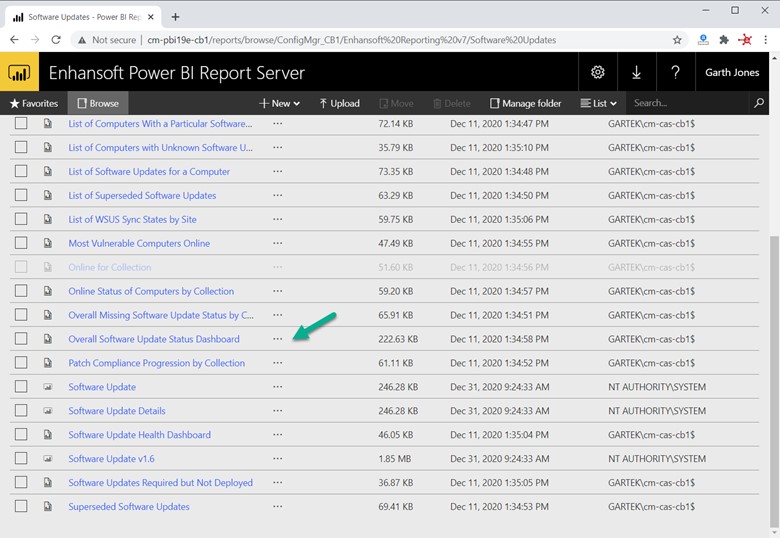
Start by browsing the folder that contains the report you want. In my case, it is the Overall Software Update Status Dashboard. Click the … (green arrow).
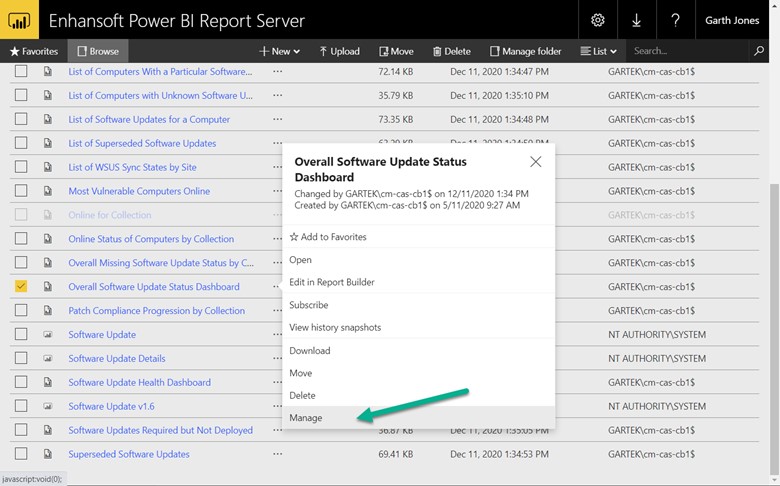
Select the Manage node.

Select the Parameters node. Notice that the “Collection” parameter doesn’t have a default value. This means that you must select the collection each time you want to run the report. Since I don’t want the CTO or security team to remember what collection to select each time, I will enter the default report parameter.
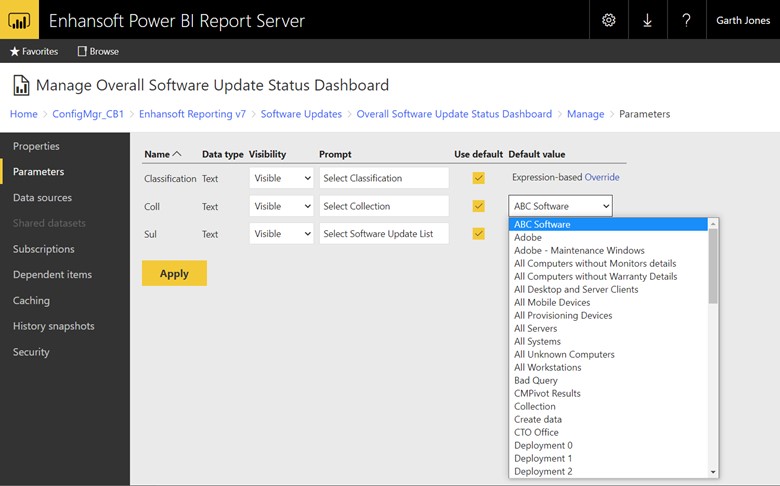
In this example, I select the Use default check box next to Select Collection, and then I select the drop-down box. This reveals the available values for this prompt.
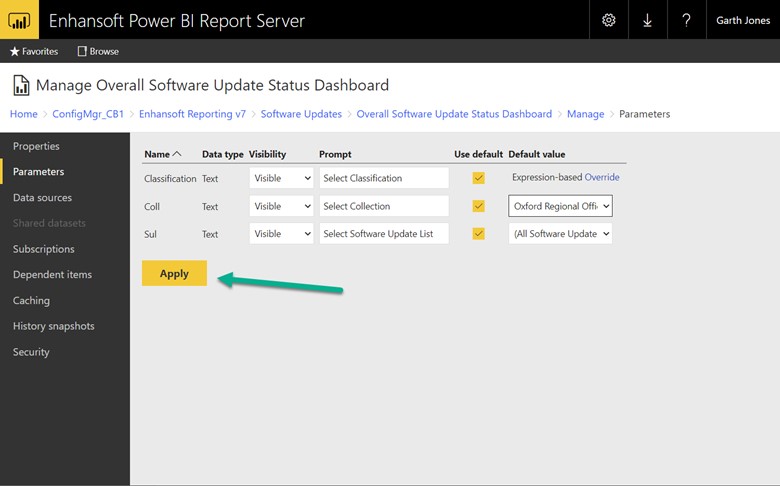
Next, I select the Oxford Regional Office for my collection. You must click on the Apply button for the default report parameter value to update. You will know that it is done when the Apply button is greyed out.
Note: Once this is set for the report it will ALSO be the default value within the ConfigMgr console.

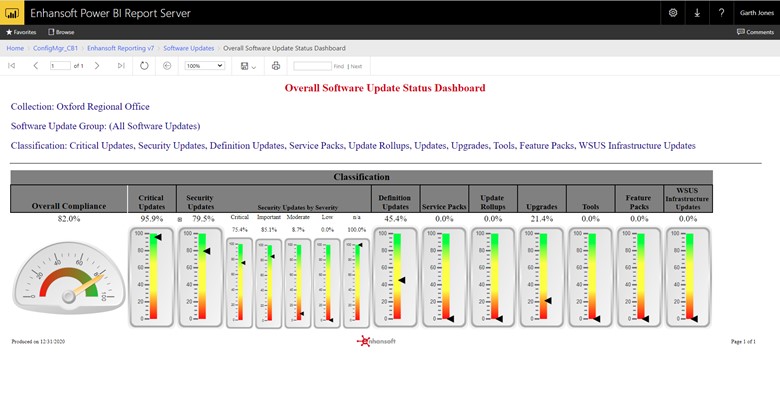
Now I run the report and the results are automatically updated. I am not asked for the value of each prompt since all are now set by default.
Bonus Tip in PBRS/SSRS
Notice within the screenshot above that there are three prompts? There’s one prompt for software update classification, another for software update group, and one more for collections. You can hide one or more of the prompts so that no one can “easily” change the values!

In order to do this, go back to the Parameters node and change the visibility to Hidden. You will need to set this option for each prompt that you want to hide.
When I run the report again, see how the prompts are now hidden?!
Setting Default Values for Prompts in Visual Studio
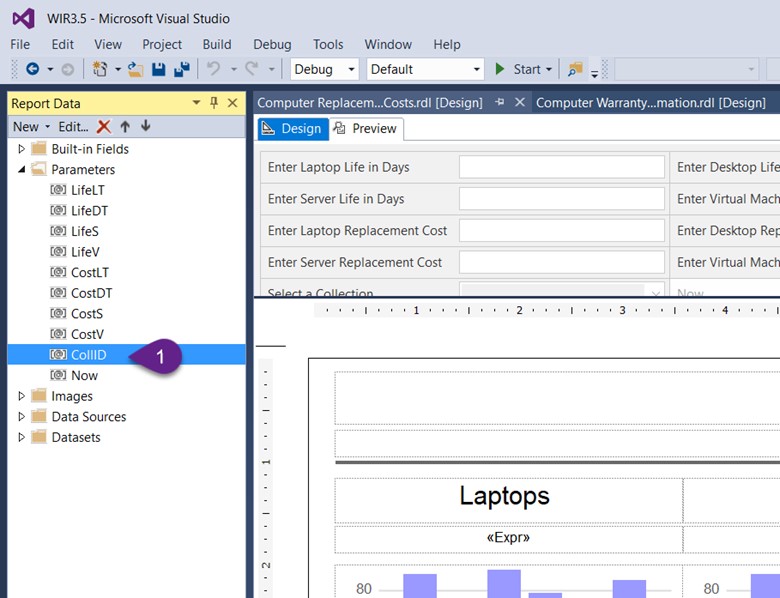
After selecting the report within Visual Studio, double-click on the prompt where you want to set the default (1).
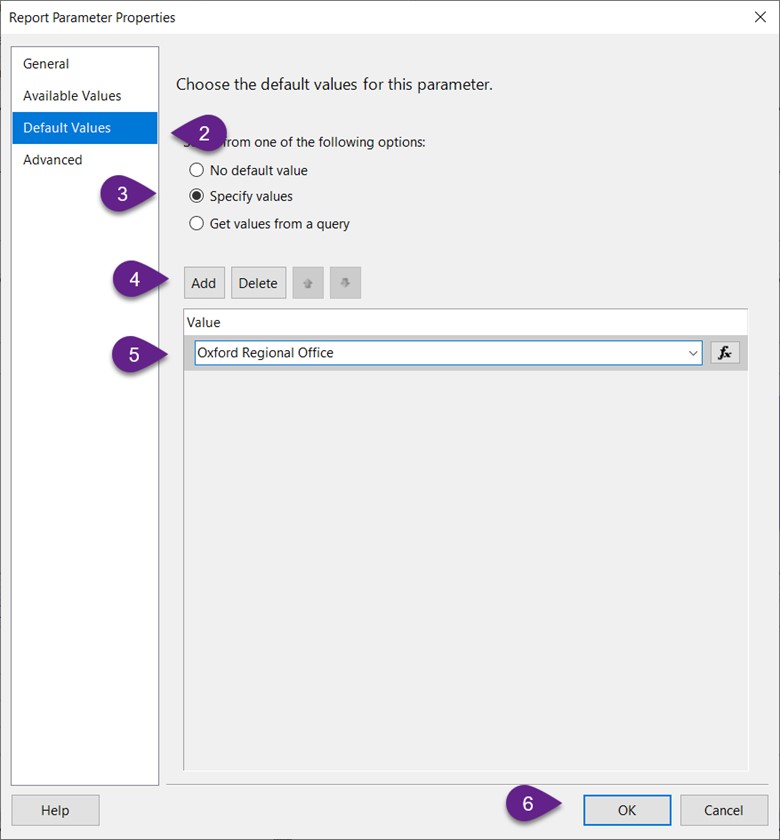
Select the Default Values node (2). Next, select the default value option. In this case, it is Specify values (3). Click on the Add button (4) and manually type in the value (5). Please note that, unlike PBRS or SSRS, this value is NOT validated. This means that if you make a typo here, the report will NOT automatically run as you intend. Finally, click OK to apply (6) the update.
Bonus Tip in Visual Studio/Report Builder
Similar to the tip I mentioned earlier for PBRS/SSRS, you can hide prompts within Visual Studio and Report Builder. As long as the value set as default is validated, the report will automatically run as intended. Why would you want to hide a prompt? If a report’s prompt value is always the same, there’s no need to bother end-users with the value.
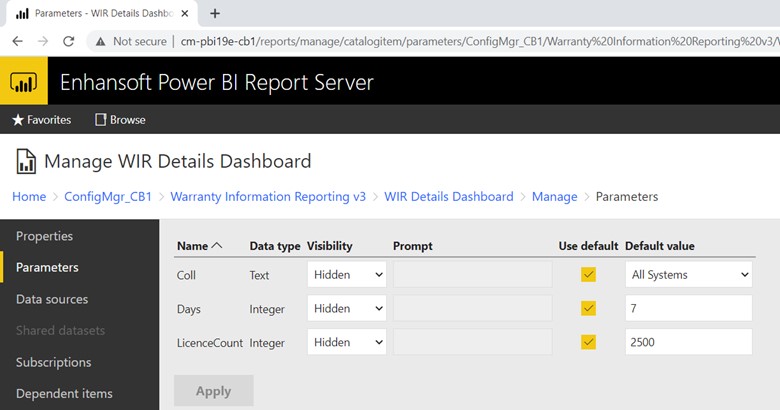
For example, within the WIR Details Dashboard, the license count has a default value and it is also a hidden prompt. This way the end-user doesn’t need to enter that value each time they want to run this dashboard. Honestly, how many would know what license count was purchased?
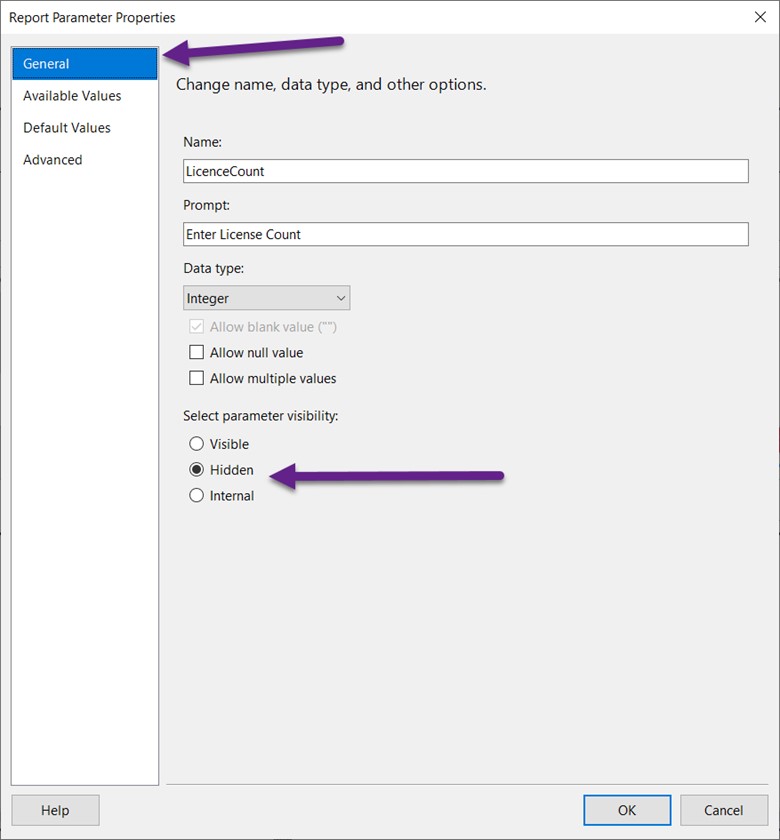
On the General node select the Hidden option under the Select parameter visibility section.
Conclusion – Default Report Parameters
If you have any questions about how to set default report parameters or how to hide prompts, please feel free to touch base with me at @GarthMJ.