Last updated on August 21st, 2022 at 03:01 pm
In my on-going blog post set on HTTPS and CDN and how to increase security and website performance, this is the first post that requires you to do some work! I’m going to show you how to order your SSL Certificate.
It might seem odd that I’m asking you to get your SSL certificate as the first action item, especially when the very last item in my overall plan is to switch over to HTTPS.
There is a method, however, to my madness! Depending on the certificate, ordering it can take as little as 15-minutes to as much as several weeks or even months. Starting the process now means that by the time you actually need it, you will have it!
The SSL certificate that I’m talking about is for your main site; it’s not for sub-sites or content websites.
Depending on your company you might want to have a Standard SSL Certificate or an Extended Validation (EV) SSL Certificate.
For a cookie free domain, I’d suggest going with the Standard SSL Certificate. In my case, my hosting provider, LFC Hosting, offers a Let’s Encrypt SSL certificate at no additional cost.
SSL Certificate Types
Standard SSL Certificate
The Standard SSL Certificate is also known as a Domain Validated (DV) certificate. It is the most basic SSL certificate available. The DV certificate simply verifies that you are on the domain that you think you’re on.
OV SSL Certificate
The Organization Validation (OV) SSL Certificate validates the domain and that the company exists. It has a higher validation level than the DV SSL certificate, but it’s a step down from an EV SSL certificate.
EV SSL Certificate
The Extended Validation (EV) SSL Certificate is the top dog in the SSL certificate world! Anyone who wants an EV SSL certificate must follow strict guidelines before one is issued. The legal identity of the company, as well as additional information, must be validated. This is the only SSL certificate that will produce a green bar in web browsers. For more details about EV SSL certificates, see this post on the CA / BROWSER forum.
Comparing EV and Standard SSL Certificates
I’ve only ordered EV and Standard SSL certificates, and based on this experience, I can tell you that you can get a Standard SSL certificate in under an hour! As their cost reflects this quick process, they are relatively inexpensive. You can order them to be valid for up to three years, so that’s good because I hate, “paper work.”
Whereas with the EV SSL certificate you must follow very strict guidelines before a certificate is issued. It isn’t quick!
The certificate issuer MUST ensure that the company exists with a valid business license. Your business MUST have a valid physical address. Your website details MUST match your business license’s physical address. The company MUST have a valid phone number which the certificate provider MUST verify via a third-party (i.e. phone book). Ultimately, the certificate issuer will need to talk to a company executive who can authorize the certificate’s creation.
The process for obtaining an EV SSL certificate will NOT get done within an hour. The first time I tried to obtain one it took a week. The last renewal took several hours (~10) over a few days before the certificate was reissued!
It should be noted that EV SSL certificates are only good for a maximum of two years.
Creating the CSR
In the following example, I will order a Standard SSL certificate from Go Daddy. Keep in mind that there are a number of other providers such as: Comodo, Digicert, and Entrust. This is by no means a detailed list of all certificate providers, nor is it to say that these are the best ones either.
1. Create a certificate signing request (CSR); you would do this with your hosting provider.
Certificate Order Process
2. Order your certificate from GoDaddy:
a. Create an account on GoDaddy.
b. Select Web Security and then SSL Certificates.
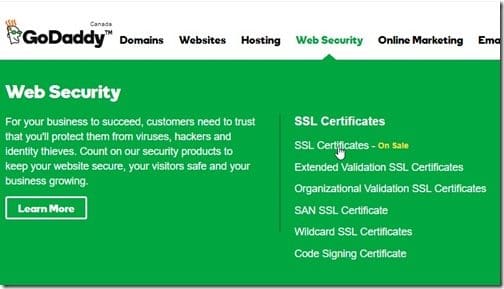
There are no tricks to this stage of the process. Simply order the certificate.

3. It might take a few minutes before your New Certificate is available to be configured, but once the New Certificate link appears, click on it.
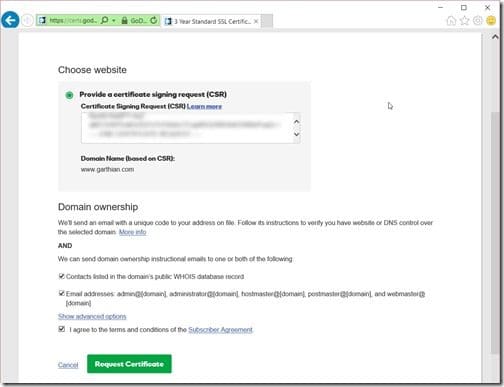
4. Take the certificate signing request (CSR) that you created in Step #1 and paste it into the text box provided. Select the, I agree to the terms and conditions of the Subscriber Agreement, check box and then click on the Request Certificate button.
IMPORTANT: Make sure that you include BOTH —–BEGIN CERTIFICATE REQUEST—– and —–END CERTIFICATE REQUEST—– text.
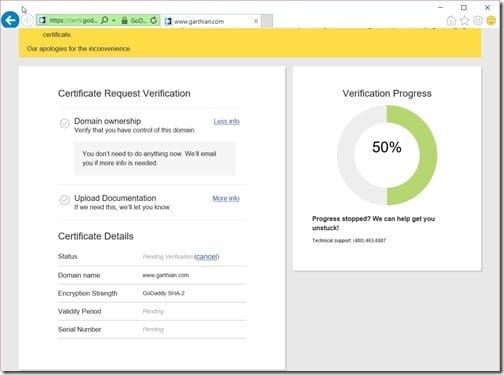
5. In the screenshot above 50% of the GoDaddy process is already completed! Now wait for the emails from GoDaddy to arrive.

6. Notice that within the email from GoDaddy you have two options to show your ownership of the domain. I’m going to use the second method and create a webpage. First I’ll follow the link (Verify domain ownership (HTML or DNS)) within the email.
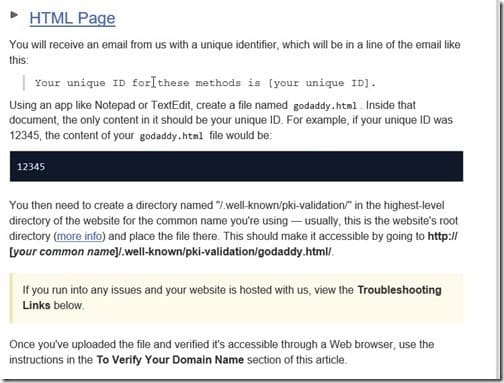
7. Create the folders and the file. Add your code to the file as per the details in the link (see the screenshot above).
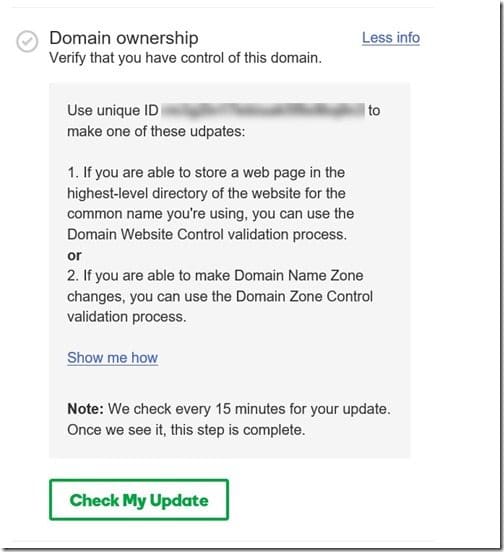
8. Go back to the GoDaddy web page and click on the Check My Update button.
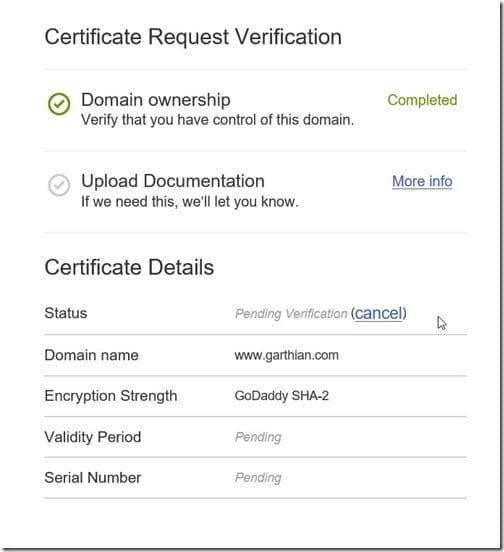
9. Now that the domain ownership is verified, you must wait for the certificate to be issued.
SSL Certificate is issued

10. Once you receive the email notifying you that your certificate is ready, log back into to your GoDaddy account.
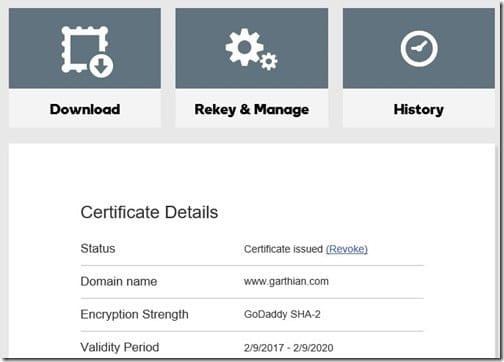
11. Click on the Download link.
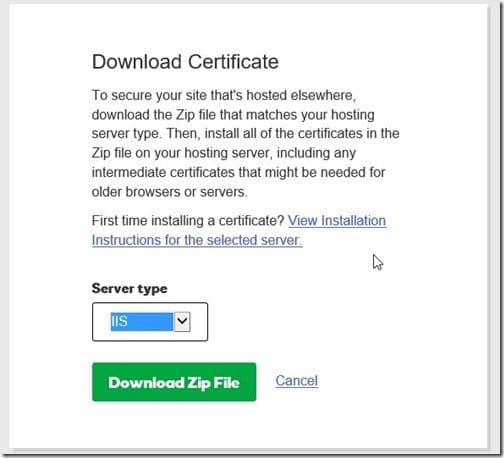
12. Select the Server type (IIS for my website) and click on the Download Zip File button.
13. At this point, email the certificate to your web hosting provider. They will install it for you.

With that last step completed you are technically done. You can now access your website as HTTPS AND HTTP.
Moving to HTTPS
In my overall plan, moving to HTTPS is the last step. You can start using it now, BUT be forewarned, there might be a ton of work to do in order to switch to HTTPS.
You will need to look at:
1. Mixed Content.
2. Updating your webmaster tools (Bing, Google, etc.) site settings to use HTTPS.
3. Updating links within your site to HTTPS.
4. Forwarding all HTTP requests to HTTPS.
You can either use WordPress plug-ins or you can hire someone to fix items 1, 3 and 4. In many cases hiring someone may prove to be cheaper than your time. If you already have experience with item 2, then it will be easy to update, but if not, you may want to hire someone.
Unfortunately, as each website is different there isn’t a lot of more detail that I can give you other than the above.
You will need to test your site page by page looking for any issues. Mixed content will be the number one issue!
In an upcoming post I will show you how to set-up CDN for your WordPress site. After that, I’ll show you how to configure CDN to use HTTPS and install/configure CDN software within WordPress. Finally, I will close out this blog post set by showing you my website’s speed test/performance results and telling you about the lessons that I learned.
If you have any questions, please feel free to contact me @GarthMJ.
